This is a recipe that I have worked on for a while to achieve the perfect Fresh-Milled Sourdough Loaves. It incorporates scalding a portion of the flour, an autolyse period, and temperature bulk fermentation. I hope your family loves it as much as we do!
Fresh-Milled Sourdough Loaf Recipe – 2 LOAVES
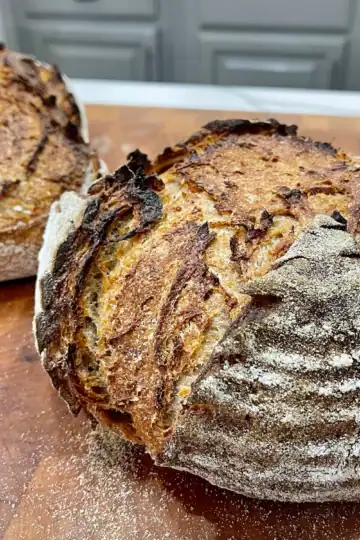
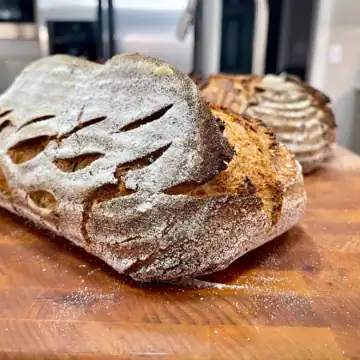
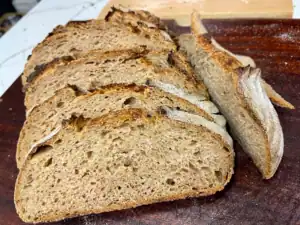
This is the recipe I have developed for my fresh-milled sourdough loaves and it's moist inside but crispy on the outside. My family loves the flavor! This recipe is for 2 loaves. I also have a scaled down version for only one loaf if you need that one.
Equipment
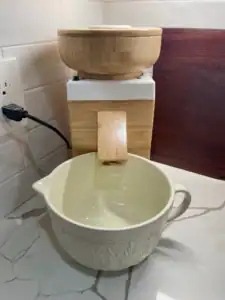
- Flour Mill I use the Nutrimill Harvest
- Bosch Universal Plus Mixer (or whatever mixer you have)
- Kettle or use the stove/microwave to heat your water
- 1 Spatula
- 6L Cambro I use this for bulk fermentation
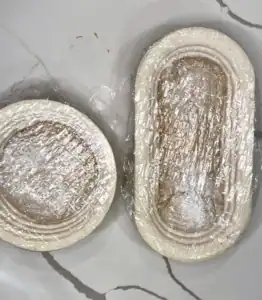
- 2 Bannetons (You could use a bowl if you don't have one. Flourside wood pulp bannetons are my favorite).
- 2 Dutch Ovens (or bake the loaves back to back with one)
- 2 Bread Slings (or parchment paper)
- 1 Lame to score the bread
Ingredients
- 334 g Hard white wheat berries
- 333 g Hard red wheat berries
- 333 g Spelt whole berries
- 780 g Spring water
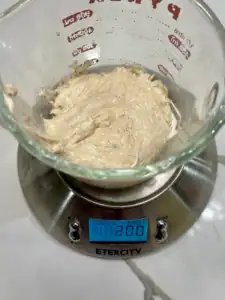
- 200 g Sourdough starter at peak
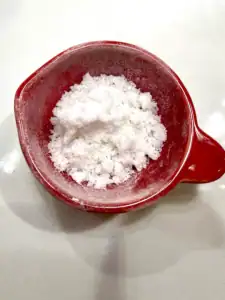
- 20 g salt
Instructions
- Mill your wheat berries to a fine flour334 g Hard white wheat berries, 333 g Hard red wheat berries, 333 g Spelt whole berries
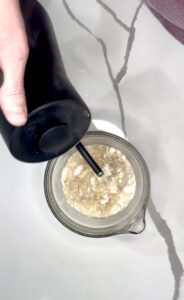
- Take 200g of the fresh-milled flour and put it in a separate bowl
- Boil 200g of water and pour over the 200g and mix until all the flour is incorporated. This is scalding a portion of the flour. Do not skip this step.
- Add the remaining 580g of water to your mixer with the remaining fresh-milled flour and mix until all of the flour is incorporated.
- Loosely cover both mixtures and let them autolyse for 1 hour. Do not skip the autolyse period!
- Measuring your salt in a small bowl to remind you to put it in.20 g salt
- After the 1 hour has passed, measure your sourdough starter.200 g Sourdough starter at peak
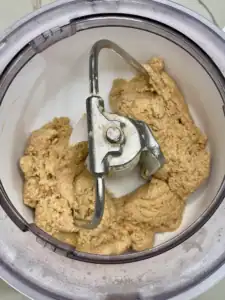
- Add the sourdough starter and salt to the mixer as well as your scalded dough ball and mix until incorporated.

- Then, knead until it is stretchy and you get a bit of a windowpane. This usually takes me 7-8 minutes in the Bosch Universal Plus. It's ok if it tears a little but stretch gently. If it tears immediately, give it another minute. If you are using a Kitchen Aid mixer, this will take considerably longer.
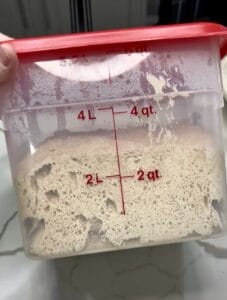
- Transfer the dough into a straight sided container with markings so you can see the percentage of rise.
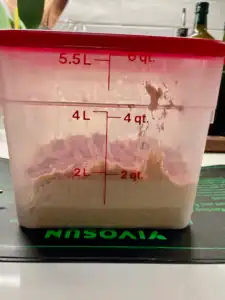
- Take the temperature of the dough and make a note of it. Temperature affects how quickly the dough will rise and how quickly it will cool off with the overnight cold proof step. I highly suggest that you read and then download and print the chart I have referenced in the notes section of this recipe. We will not be going based on a bulk fermentation time, but rather a percentage. Your goal percentage will vary by season, house temperature, water temperature, etc. If it is really cold in your house, you can get a seedling mat relatively inexpensively to put under your dough to keep it warm.

- Once the dough reaches your goal bulk fermentation percentage, it should have bubbles all the way through the dough and you are ready to proceed with shaping your loaves.
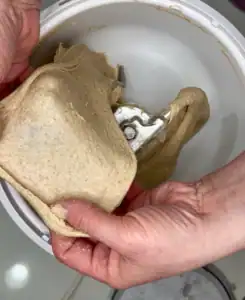
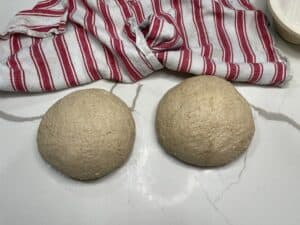
- Dump your dough out onto your counter. I have quartz and can usually do this without adding additional flour, oil, or water. It is best not to dust your counter with flour at this stage. Dump the dough onto your counter and split it into 2. Gently pre-shape the two equal dough sections into balls and cover. Allow them to rest for 20 minutes.
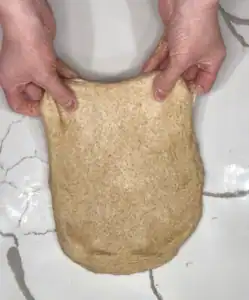
- After your rest period is over, you will want to do your final shaping. You will do the shaping for one dough ball and then repeat and do it for the other one. On the first dough ball, gently stretch the dough out.
- fold it over like an envelope

- Now roll it up.
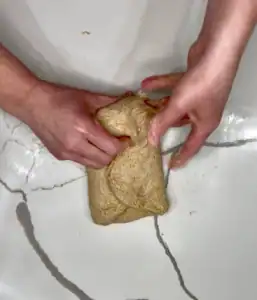
- Next do a couple of pulls toward you with both hands to tighten up the surface and give it some tension.
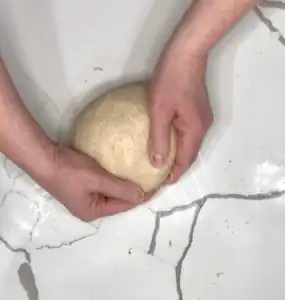
- Lightly dust your bannetons with rice flour and transfer your dough balls into the banneton with the seam up then cover them. I use food grade plastic covers that have an elastic band in them. They look somewhat like a shower cap. After covering, let your dough rest for 20 minutes.
- After the 20 minutes of resting has passed, place your banneton in the fridge overnight. I usually cold proof my dough in the fridge for 12 hours minimum. I have even sucessfully done longer.
- When you are ready to bake your bread, place your dutch oven with the lid on in your oven. Preheat your oven to 475 degrees Fahrenheit.
- Once the oven is preheated, place a silicone bread sling or parchment paper down on the counter and lightly dust it with rice flour. Take your banneton out of the fridge and remove the covering. Place the bread sling upside down on the top of your banneton and invert it to transfer your dough to the bread sling.
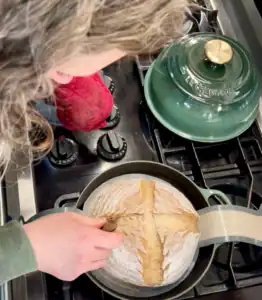
- Score your bread. A simple score is to cut down the middle on both sides creating 4 sections on a round loaf. Otherwise, you will want to score with your lame horizontal with the countertop and make one quick motion from the top right down to the bottom right of the bread. This allows the bread room to expand in the oven.

- Spray the top of your loaves with water (I use a hair mister that I bought specifically for that and keep it with my sourdough supplies). Then dust a little additional rice flour on top.
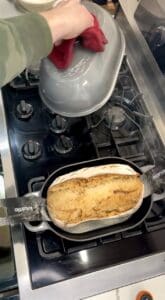
- Remove the dutch oven from your oven USING OVEN MITS. It will be very hot. Remove the lid. Transfer your bread to the dutch oven with caution so you do not touch it. That's one of the reasons I love the bread slings. Tuck the bread sling ends onto the loaf and close the lid. Repeat for the other loaf.
- Transfer the dutch ovens into the oven with caution since they will be very hot. Set a timer for 7 minutes.
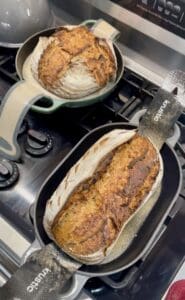
- Remove the dutch ovens from the oven, take the lid off, and retrace your expansion score. This will allow the bread to open up slightly more. Then put the lid back on. Do this on both loaves and put them back in the oven. Set a timer for 28 minutes.
- When the timer goes off, reduce the oven temperature to 450 degrees. Remove the dutch ovens from the oven and take the lids off. Then, put the bread back into the oven. Set a timer for 10 minutes to bake the bread with the lid off.
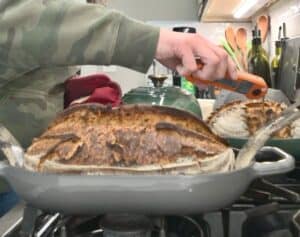
- When the timer goes off, take both dutch ovens out of the oven.
- Check that the internal temperature of your bread is around 208-210 degrees to insure that it is cooked completely. If it is not, you may need to put it back in for another minute or so until it reaches that temperature window.
- Turn off the oven and then transfer the bread with the bread sling to a cooling rack or butcher block to cool completely,. I pull the bread slings out and push the bread to the side so that I can go ahead and wash them.
- Allow the bread to cool COMPLETELY before you slice into it! It can be very tempting to slice into warm bread, but it will make it slightly gummy and not last as long.
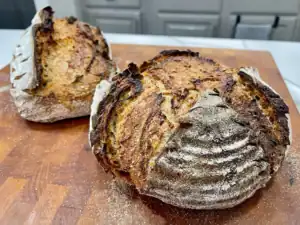
- Once your bread has cooled off completely, you can slice and enjoy.
Notes
Read and print the chart from our Bulk Fermentation Based on Temperature for Sourdough Breads.
This recipe is for 2 loaves. You can divide it in half and only make one if you like. I find it easier to just make 2 at a time since it doesn’t take much additional time for the second loaf while you are doing it.
Since our household is down to only 3 of us now, we slice all of the bread, put a few slices in each quart sized bag, and put all of the quart sized bags in a bigger 2 gallon freezer bag. This allows us to pull the bread out of the freezer in smaller portions to thaw and use. We keep a few slices at a time in the refrigerator that way it never goes bad on us. When the big bag in the freezer gets low, it’s time to make more.
Tried this recipe?Let us know how it was!